(Added Junk Flea (Dark), Death Cube, Noxious Damnation.) Tag: Visual edit |
|||
| (26 intermediate revisions by 6 users not shown) | |||
| Line 1: | Line 1: | ||
| + | __NOTOC__ |
||
| − | A '''Map''' is one of the various settings, or playing fields, in [[Combat Arms]]. |
||
| + | A '''Map''' is one of the various settings, or playing fields, in [[Combat Arms]]. Each layout has its advantages as well as disadvantages. Knowing the map and what tactics to use will improve your chances of winning, such as wearing a [[Uniform]] in order to blend into the environment and using any available [[Props|props]] to your advantage. |
||
| + | ==All Maps in Alphabetical Order== |
||
| − | Each layout has its advantages as well as disadvantages. Knowing the map and what tactics to use will improve your chances of winning, such as wearing a [[Uniform]] in order to blend into the environment and using any available [[Props|props]] to your advantage. |
||
| + | <tabber> |
||
| + | Page 1= |
||
| + | {|align="center" style="text-align:center" |
||
| + | | class="hovernav" | [[File:Map_BlackLung.png|126px|link=Black Lung]]<div style="position:relative"><small>'''[[Black Lung]]'''</small></div> |
||
| + | | class="hovernav" | [[File:Map_Blood.png|126px|link=Blood Money]]<div style="position:relative"><small>'''[[Blood Money]]'''</small></div> |
||
| + | | class="hovernav" | [[File:Map_Bloodbath.png|126px|link=Bloodbath Bazaar]]<div style="position:relative"><small>'''[[Bloodbath Bazaar]]'''</small></div> |
||
| + | | class="hovernav" | [[File:Map_Brushwood.png|126px|link=Brushwood]]<div style="position:relative"><small>'''[[Brushwood]]'''</small></div> |
||
| + | | class="hovernav" | [[File:Map_CabinFever.png|126px|link=Cabin Fever]]<div style="position:relative"><small>'''[[Cabin Fever]]'''</small></div> |
||
| + | | class="hovernav" | [[File:Map_Castle.png|126px|link=Castle Storm]]<div style="position:relative"><small>'''[[Castle Storm]]'''</small></div> |
||
| + | |- |
||
| + | | class="hovernav" | [[File:City_Center.png|126px|link=Battle at City Center]]<div style="position:relative"><small>'''[[Battle at City Center|City Center]]'''</small></div> |
||
| + | | class="hovernav" | [[File:Map_CityWings.png|126px|link=City of Wings]]<div style="position:relative"><small>'''[[City of Wings]]'''</small></div> |
||
| + | | class="hovernav" | [[File:Map_ColdSeed.png|126px|link=Cold Seed]]<div style="position:relative"><small>'''[[Cold Seed]]'''</small></div> |
||
| + | | class="hovernav" | [[File:Map_CostaRecon.png|126px|link=Costa Recon]]<div style="position:relative"><small>'''[[Costa Recon]]'''</small></div> |
||
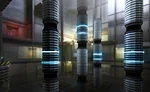
| + | | class="hovernav" | [[File:Map_Crystal.png|126px|link=Crystal Tower]]<div style="position:relative"><small>'''[[Crystal Tower]]'''</small></div> |
||
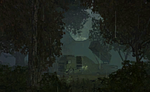
| + | | class="hovernav" | [[File:Map_Forest.png|126px|link=Dark Forest]]<div style="position:relative"><small>'''[[Dark Forest]]'''</small></div> |
||
| + | |- |
||
| + | | class="hovernav" | [[File:Map_DarkHills.png|126px|link=Dark Hill]]<div style="position:relative"><small>'''[[Dark Hill]]'''</small></div> |
||
| + | | class="hovernav" | [[File:Map_Vacation.png|126px|link=Dead Vacation]]<div style="position:relative"><small>'''[[Dead Vacation]]'''</small></div> |
||
| + | | class="hovernav" | [[File:Map_DeadWater.png|126px|link=Dead Water]]<div style="position:relative"><small>'''[[Dead Water]]'''</small></div> |
||
| + | | class="hovernav" | [[File:Map_Dunes.png|126px|link=Deadly Dunes]]<div style="position:relative"><small>'''[[Deadly Dunes]]'''</small></div> |
||
| + | | class="hovernav" | [[File:Map_Death_Cube.png|126px|link=Death Cube]]<div style="position:relative"><small>'''[[Death Cube]]'''</small></div> |
||
| + | | class="hovernav" | [[File:Map_DeathRoom.png|126px|link=Death Room]]<div style="position:relative"><small>'''[[Death Room]] ([[Death Room (Invis)|Invis]])'''</small></div> |
||
| + | |} |
||
| + | |-| |
||
| − | ==Map Sizes== |
||
| + | Page 2= |
||
| − | *Very Small |
||
| + | {|align="center" style="text-align:center" |
||
| − | *Small |
||
| + | | class="hovernav" | [[File:Map_DeathRow.png|126px|link=Death Row]]<div style="position:relative"><small>'''[[Death Row]]'''</small></div> |
||
| − | *Medium |
||
| + | | class="hovernav" | [[File:Map_DesertFox.png|126px|link=Desert Fox]]<div style="position:relative"><small>'''[[Desert Fox]]'''</small></div> |
||
| − | *Large |
||
| + | | class="hovernav" | [[File:Map_Glitch.png|126px|link=Glitch Map]]<div style="position:relative"><small>'''[[Glitch Map|Desert Storm]]'''</small></div> |
||
| − | *Very Large |
||
| + | | class="hovernav" | [[File:Map_Thunder.png|126px|link=Desert Thunder]]<div style="position:relative"><small>'''[[Desert Thunder]]'''</small></div> |
||
| − | *Extremely Large |
||
| + | | class="hovernav" | [[File:Map_Dredge.png|126px|link=Dredge]]<div style="position:relative"><small>'''[[Dredge]]'''</small></div> |
||
| − | ==List of EVERY MAP in Alphabetical Order== |
||
| + | | class="hovernav" | [[File:Map_Freezer.png|126px|link=Freezer]]<div style="position:relative"><small>'''[[Freezer]]'''</small></div> |
||
| − | #[[Battle at City Center]] |
||
| + | |- |
||
| − | #[[Black Lung]] |
||
| + | | class="hovernav" | [[File:Map_GhostTown.png|126px|link=Ghost Town]]<div style="position:relative"><small>'''[[Ghost Town]]'''</small></div> |
||
| − | #[[Bloodbath Bazaar]] |
||
| + | | class="hovernav" | [[File:Map_Grave.png|126px|link=Grave Digger]]<div style="position:relative"><small>'''[[Grave Digger]]'''</small></div> |
||
| − | #[[Blood Money]] |
||
| + | | class="hovernav" | [[File:Map_Hammer.png|126px|link=Gray Hammer]]<div style="position:relative"><small>'''[[Gray Hammer]]'''</small></div> |
||
| − | #[[Brushwood]] |
||
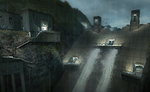
| + | | class="hovernav" | [[File:Map_Ravine.png|126px|link=Hallow Ravine]]<div style="position:relative"><small>'''[[Hallow Ravine]]'''</small></div> |
||
| − | #[[Cabin Fever]] |
||
| + | | class="hovernav" | [[File:Map_HeavyMetal.png|126px|link=Heavy Metal]]<div style="position:relative"><small>'''[[Heavy Metal]]'''</small></div> |
||
| − | #[[City of Wings]] |
||
| + | | class="hovernav" | [[File:Map_Heir.png|126px|link=Heir of the Tomb]]<div style="position:relative"><small>'''[[Heir of the Tomb]]'''</small></div> |
||
| − | #[[Cold Seed]] |
||
| + | |- |
||
| − | #[[Costa Recon]] |
||
| + | | class="hovernav" | [[File:Map_HellGate.png|126px|link=Hell Gate]]<div style="position:relative"><small>'''[[Hell Gate]]'''</small></div> |
||
| − | #[[Dark Forest]] |
||
| + | | class="hovernav" | [[File:Map_JunkFlea.png|126px|link=Junk Flea]]<div style="position:relative"><small>'''[[Junk Flea]] ([[Junk Flea (Dark)|Dark]])'''</small></div> |
||
| − | #[[Death Room]] |
||
| + | | class="hovernav" | [[File:Map_JunkFlea 2.png|126px|link=Junk Flea 2]]<div style="position:relative"><small>'''[[Junk Flea 2]]'''</small></div> |
||
| − | #[[Death Row]] |
||
| + | | class="hovernav" | [[File:Map_KillCreek.png|126px|link=Kill Creek]]<div style="position:relative"><small>'''[[Kill Creek]]'''</small></div> |
||
| − | #[[Desert Fox]] |
||
| + | | class="hovernav" | [[File:Map_Vegas.png|126px|link=Last Vegas]]<div style="position:relative"><small>'''[[Last Vegas]]'''</small></div> |
||
| − | #[[Desert Thunder]] |
||
| + | | class="hovernav" | [[File:Map_LunarLabs.png|126px|link=Lunar Labs]]<div style="position:relative"><small>'''[[Lunar Labs]]'''</small></div> |
||
| − | #[[Dredge]] |
||
| + | |} |
||
| − | #[[Ghost Town]] |
||
| + | |||
| − | #[[Grave Digger]] |
||
| + | |-| |
||
| − | #[[Gray Hammer]] |
||
| + | Page 3= |
||
| − | #[[Hallow Ravine]] |
||
| + | {|align="center" style="text-align:center" |
||
| − | #[[Junk Flea]] |
||
| + | | class="hovernav" | [[File:Map_NemexisHQ.png|126px|link=NEMEXIS HQ]]<div style="position:relative"><small>'''[[NEMEXIS HQ|Nemexis HQ]]'''</small></div> |
||
| − | #[[Junk Flea 2]] |
||
| + | | class="hovernav" | [[File:Map_NemexisLab.png|126px|link=NEMEXIS Labs]]<div style="position:relative"><small>'''[[NEMEXIS Labs|Nemexis Labs]]'''</small></div> |
||
| − | #[[Kill Creek]] |
||
| + | | class="hovernav" | [[File:Map_Neptune.png|126px|link=Neptune]]<div style="position:relative"><small>'''[[Neptune]]'''</small></div> |
||
| − | #[[Lunar Labs]] |
||
| + | | class="hovernav" | [[File:Map_Noxious_Damnation.png|126px|link=Noxious Damnation]]<div style="position:relative"><small>'''[[Noxious Damnation]]'''</small></div> |
||
| − | #[[NEMEXIS HQ]] |
||
| + | | class="hovernav" | [[File:Map_Office.png|126px|link=http://combatarms.wikia.com/wiki/File:Office_Map_Leak.png]]<div style="position:relative"><small>'''[[Office]] ([http://combatarms.wikia.com/wiki/File:Office_Map_Leak.png Leak])'''</small></div> |
||
| − | #[[NEMEXIS Labs]] |
||
| + | | class="hovernav" | [[File:Map_OilRig.png|126px|link=Oil Rig]]<div style="position:relative"><small>'''[[Oil Rig]]'''</small></div> |
||
| − | #[[Neptune]] |
||
| + | |- |
||
| − | #[[Oil Rig]] |
||
| + | | class="hovernav" | [[File:Map_Outpost.png|126px|link=Outpost 31]]<div style="position:relative"><small>'''[[Outpost 31]]'''</small></div> |
||
| − | #[[Overdose]] |
||
| + | | class="hovernav" | [[File:Map_Overdose.png|126px|link=Overdose]]<div style="position:relative"><small>'''[[Overdose]]'''</small></div> |
||
| − | #[[Piazza]] |
||
| + | | class="hovernav" | [[File:Map_Piazza.png|126px|link=Piazza]]<div style="position:relative"><small>'''[[Piazza]]'''</small></div> |
||
| − | #[[Power Surge]] |
||
| + | | class="hovernav" | [[File:Map_PowerSurge.png|126px|link=Power Surge]]<div style="position:relative"><small>'''[[Power Surge]]'''</small></div> |
||
| − | #[[Pump Jack]] |
||
| + | | class="hovernav" | [[File:Map_PumpJack.png|126px|link=Pump Jack]]<div style="position:relative"><small>'''[[Pump Jack]]'''</small></div> |
||
| − | #[[Quantum Labs]] |
||
| + | | class="hovernav" | [[File:Map_Quantum.png|126px|link=Quantum Labs]]<div style="position:relative"><small>'''[[Quantum Labs]]'''</small></div> |
||
| − | #[[Rattlesnake]] |
||
| + | |- |
||
| − | #[[Red Canyon]] |
||
| + | | class="hovernav" | [[File:Map_Rattlesnake.png|126px|link=Rattlesnake]]<div style="position:relative"><small>'''[[Rattlesnake]]'''</small></div> |
||
| − | #[[Roadkill]] |
||
| + | | class="hovernav" | [[File:Map_Canyon.png|126px|link=Red Canyon]]<div style="position:relative"><small>'''[[Red Canyon]]'''</small></div> |
||
| − | #[[Rural Estate]] |
||
| + | | class="hovernav" | [[File:Map_Roadkill.png|126px|link=Roadkill]]<div style="position:relative"><small>'''[[Roadkill]]'''</small></div> |
||
| − | #[[Sand Hog]] |
||
| + | | class="hovernav" | [[File:Map_Estate.png|126px|link=Rural Estate]]<div style="position:relative"><small>'''[[Rural Estate]]'''</small></div> |
||
| − | #[[Sector 25]] |
||
| + | | class="hovernav" | [[File:Map_SandHog.png|126px|link=Sand Hog]]<div style="position:relative"><small>'''[[Sand Hog]]'''</small></div> |
||
| − | #[[Short Fuse]] |
||
| + | | class="hovernav" | [[File:Map_Sector25.png|126px|link=Sector 25]]<div style="position:relative"><small>'''[[Sector 25]]'''</small></div> |
||
| − | #[[Showdown]] |
||
| + | |} |
||
| − | #[[Slaughterhouse]] |
||
| + | |||
| − | #[[Snow Valley]] |
||
| + | |-| |
||
| − | #[[Training Grounds]] |
||
| + | Page 4= |
||
| − | #[[Two Towers]] |
||
| + | {|align="center" style="text-align:center" |
||
| − | #[[Vertigo]] |
||
| + | | class="hovernav" | [[File:Map_ShortFuse.png|126px|link=Short Fuse]]<div style="position:relative"><small>'''[[Short Fuse]]'''</small></div> |
||
| − | #[[Warhead]] |
||
| + | | class="hovernav" | [[File:Map_Showdown.png|126px|link=Showdown]]<div style="position:relative"><small>'''[[Showdown]]'''</small></div> |
||
| − | #Water Strider |
||
| + | | class="hovernav" | [[File:Map_Square.png|126px|link=Silent Square]]<div style="position:relative"><small>'''[[Silent Square]]'''</small></div> |
||
| − | #[[Waverider]] |
||
| + | | class="hovernav" | [[File:Map_Slaugher.png|126px|link=Slaughterhouse]]<div style="position:relative"><small>'''[[Slaughterhouse]]'''</small></div> |
||
| + | | class="hovernav" | [[File:Map_SnowValley.png|126px|link=Snow Valley]]<div style="position:relative"><small>'''[[Snow Valley]]'''</small></div> |
||
| + | | class="hovernav" | [[File:Map_Bridge.png|126px|link=Tower Bridge]]<div style="position:relative"><small>'''[[Tower Bridge]]'''</small></div> |
||
| + | |- |
||
| + | | class="hovernav" | [[File:Map_Training.png|126px|link=Training Grounds]]<div style="position:relative"><small>'''[[Training Grounds]]'''</small></div> |
||
| + | | class="hovernav" | [[File:Map_Treasure.png|126px|link=Treasure Ship]]<div style="position:relative"><small>'''[[Treasure Ship]]'''</small></div> |
||
| + | | class="hovernav" | [[File:Map_TwoTowers.png|126px|link=Two Towers]]<div style="position:relative"><small>'''[[Two Towers]]'''</small></div> |
||
| + | | class="hovernav" | [[File:Map_Vertigo.png|126px|link=Vertigo]]<div style="position:relative"><small>'''[[Vertigo]]'''</small></div> |
||
| + | | class="hovernav" | [[File:Map_MouseTrap.png|126px|link=Warehouse]]<div style="position:relative"><small>'''[[Warehouse]]'''</small></div> |
||
| + | | class="hovernav" | [[File:Map_Warhead.png|126px|link=Warhead]]<div style="position:relative"><small>'''[[Warhead]]'''</small></div> |
||
| + | |- |
||
| + | | class="hovernav" | [[File:Map_Water.png|126px|link=Water Strider]]<div style="position:relative"><small>'''[[Water Strider]]'''</small></div> |
||
| + | | class="hovernav" | [[File:Map_Waverider.png|126px|link=Waverider]]<div style="position:relative"><small>'''[[Waverider]]'''</small></div> |
||
| + | | class="hovernav" | [[File:Map_Random.png|126px|link=Map]]<div style="position:relative"><small>'''-'''</small></div> |
||
| + | | class="hovernav" | [[File:Map_Random.png|126px|link=Map]]<div style="position:relative"><small>'''-'''</small></div> |
||
| + | | class="hovernav" | [[File:Map_Random.png|126px|link=Map]]<div style="position:relative"><small>'''-'''</small></div> |
||
| + | | class="hovernav" | [[File:Map_Random.png|126px|link=Map]]<div style="position:relative"><small>'''-'''</small></div> |
||
| + | |} |
||
| + | </tabber> |
||
==Maps by Category== |
==Maps by Category== |
||
| + | <tabber> |
||
| − | ===Urban Warzones=== |
||
| + | Urban= |
||
| − | *[[Waverider]] |
||
| + | {{Col-begin}} |
||
| − | *[[Showdown]] |
||
| + | {{MultiColumnList}} |
||
| − | *[[Short Fuse]] |
||
| − | *[[Vertigo]] |
||
| − | *[[Ghost Town]] |
||
| − | *[[Roadkill]] |
||
| − | *[[Warhead]] |
||
*[[Blood Money]] |
*[[Blood Money]] |
||
| − | *[[Piazza]] |
||
| − | *[[Neptune]] |
||
| − | *[[Death Row]] |
||
*[[Bloodbath Bazaar]] |
*[[Bloodbath Bazaar]] |
||
| − | *[[Battle at City Center]] |
+ | *[[Battle at City Center|City Center]] |
*[[City of Wings]] |
*[[City of Wings]] |
||
| + | *[[Crystal Tower]] |
||
| + | *[[Death Row]] |
||
| + | *[[Ghost Town]] |
||
| + | {{MultiColumnList}} |
||
| + | *[[NEMEXIS HQ|Nemexis HQ]] |
||
| + | *[http://combatarms.wikia.com/wiki/File:Office_Map_Leak.png Office (Leak)] |
||
| + | *[[Piazza]] |
||
| + | *[[Roadkill]] |
||
| + | *[[Rural Estate]] |
||
| + | *[[Short Fuse]] |
||
| + | *[[Showdown]] |
||
| + | {{MultiColumnList}} |
||
| + | *[[Silent Square]] |
||
| + | *[[Tower Bridge]] |
||
| + | *[[Vertigo]] |
||
| + | *[[Warhead]] |
||
| + | *[[Waverider]] |
||
| + | {{MultiColumnList}} |
||
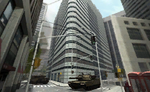
| + | [[File:City_Center.png|thumb|150px|link=Battle at City Center]] |
||
| + | {{Col-end}} |
||
| + | |-| |
||
| − | ===Industrial Warzones=== |
||
| + | Industrial= |
||
| − | *[[Gray Hammer]] |
||
| + | {{Col-begin}} |
||
| + | {{MultiColumnList}} |
||
*[[Death Room]] |
*[[Death Room]] |
||
| + | *[[Death Room (Invis)]] |
||
| + | *[[Gray Hammer]] |
||
| + | *[[Heavy Metal]] |
||
| + | {{MultiColumnList}} |
||
| + | *[[Hell Gate]] |
||
| + | *[[Neptune]] |
||
| + | *[[Oil Rig]] |
||
*[[Power Surge]] |
*[[Power Surge]] |
||
| + | {{MultiColumnList}} |
||
| + | *[[Quantum Labs]] |
||
*[[Sector 25]] |
*[[Sector 25]] |
||
| − | *[[ |
+ | *[[Slaughterhouse]] |
| − | *[[ |
+ | *[[Warehouse]] |
| + | {{MultiColumnList}} |
||
| − | *[[Quantum Labs]] |
||
| + | [[File:Map_HeavyMetal.png|thumb|150px|link=Heavy Metal]] |
||
| − | *[[Lunar Labs]] |
||
| + | {{Col-end}} |
||
| + | |-| |
||
| − | ===Desert Warzones=== |
||
| + | Desert= |
||
| + | {{Col-begin}} |
||
| + | {{MultiColumnList}} |
||
| + | *[[Deadly Dunes]] |
||
| + | *[[Desert Fox]] |
||
| + | *[[Desert Thunder]] |
||
| + | *[[Glitch Map]] |
||
| + | {{MultiColumnList}} |
||
*[[Junk Flea]] |
*[[Junk Flea]] |
||
| + | *[[Junk Flea (Dark)]] |
||
| + | *[[Junk Flea 2]] |
||
*[[Pump Jack]] |
*[[Pump Jack]] |
||
| + | {{MultiColumnList}} |
||
| + | *[[Red Canyon]] |
||
*[[Sand Hog]] |
*[[Sand Hog]] |
||
| + | {{MultiColumnList}} |
||
| − | *[[Desert Thunder]] (Sand Hog Fireteam only) |
||
| + | [[File:Map_Dunes.png|thumb|150px|link=Deadly Dunes]] |
||
| − | *[[Desert Fox]] (Sand Hog Fireteam only) |
||
| + | {{Col-end}} |
||
| − | *[[Red Canyon]] |
||
| + | |-| |
||
| − | ===Arctic Warzones=== |
||
| + | Arctic= |
||
| + | {{Col-begin}} |
||
| + | {{MultiColumnList}} |
||
*[[Cold Seed]] |
*[[Cold Seed]] |
||
| − | *[[ |
+ | *[[Dark Hill]] |
| + | *[[Freezer]] |
||
| + | {{MultiColumnList}} |
||
*[[Hallow Ravine]] |
*[[Hallow Ravine]] |
||
| + | *[[Outpost 31]] |
||
| + | *[[Snow Valley]] |
||
| + | {{MultiColumnList}} |
||
| + | {{MultiColumnList}} |
||
| + | [[File:Map_SnowValley.png|thumb|150px|link=Snow Valley]] |
||
| + | {{Col-end}} |
||
| + | |-| |
||
| − | ===Woodland Warzones=== |
||
| + | Woodland= |
||
| + | {{Col-begin}} |
||
| + | {{MultiColumnList}} |
||
| + | *[[Cabin Fever]] |
||
| + | *[[Dark Forest]] |
||
| + | *[[Dark Hill]] |
||
| + | {{MultiColumnList}} |
||
*[[Grave Digger]] |
*[[Grave Digger]] |
||
| − | *[[Cabin Fever ]](Infected Fireteam only) |
||
*[[Kill Creek]] |
*[[Kill Creek]] |
||
| + | *[[Training Grounds|Training]] |
||
| − | *[[Dark Forest]] |
||
| + | {{MultiColumnList}} |
||
| − | *[[Training Grounds ]](Training Only) |
||
| + | {{MultiColumnList}} |
||
| − | ===Tropical Warzones=== |
||
| + | [[File:Map_Forest.png|thumb|150px|link=Dark Forest]] |
||
| + | {{Col-end}} |
||
| + | |||
| + | |-| |
||
| + | Tropical= |
||
| + | {{Col-begin}} |
||
| + | {{MultiColumnList}} |
||
*[[Brush Wood]] |
*[[Brush Wood]] |
||
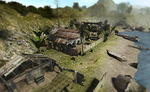
*[[Costa Recon]] |
*[[Costa Recon]] |
||
| + | *[[Noxious Damnation]] |
||
| + | {{MultiColumnList}} |
||
*[[Rattle Snake]] |
*[[Rattle Snake]] |
||
| + | {{MultiColumnList}} |
||
| − | ===Underground Warzones=== |
||
| + | {{MultiColumnList}} |
||
| + | [[File:Map_CostaRecon.png|thumb|150px|link=Costa Recon]] |
||
| + | {{Col-end}} |
||
| + | |||
| + | |-| |
||
| + | Underground= |
||
| + | {{Col-begin}} |
||
| + | {{MultiColumnList}} |
||
| + | *[[Black Lung]] |
||
| + | *[[Death Cube]] |
||
*[[Dredge]] |
*[[Dredge]] |
||
| + | {{MultiColumnList}} |
||
| − | *[[Black Lung]] (Infected Fireteam only) |
||
| + | *[[NEMEXIS Labs]] |
||
| + | *[[Noxious Damnation]] |
||
*[[Overdose]] |
*[[Overdose]] |
||
| + | {{MultiColumnList}} |
||
| + | {{MultiColumnList}} |
||
| + | [[File:Map_Dredge.png|thumb|150px|link=Dredge]] |
||
| + | {{Col-end}} |
||
| + | |-| |
||
| − | === Oceanic Warzones === |
||
| + | Oceanic= |
||
| − | *[[Operation: Oilrig|Oil Rig]] |
||
| + | {{Col-begin}} |
||
| − | *[[Two Towers]] |
||
| + | {{MultiColumnList}} |
||
| + | *[[Dead Water]] |
||
*[[Neptune]] |
*[[Neptune]] |
||
| + | *[[Oil Rig]] |
||
| − | ===Future Warzones=== |
||
| + | {{MultiColumnList}} |
||
| − | *[[Quantum Labs]] |
||
| + | *[[Treasure Ship]] |
||
| + | *[[Two Towers]] |
||
| + | *[[Water Strider]] |
||
| + | {{MultiColumnList}} |
||
| + | {{MultiColumnList}} |
||
| + | [[File:Map Water.png|thumb|150px|link=Water Strider]] |
||
| + | {{Col-end}} |
||
| + | |||
| + | |-| |
||
| + | Futuristic= |
||
| + | {{Col-begin}} |
||
| + | {{MultiColumnList}} |
||
*[[Lunar Labs]] |
*[[Lunar Labs]] |
||
| + | *[[NEMEXIS Labs]] |
||
| + | *[[Quantum Labs]] |
||
| + | {{MultiColumnList}} |
||
| + | {{MultiColumnList}} |
||
| + | {{MultiColumnList}} |
||
| + | [[File:Map LunarLabs.png|thumb|150px|link=Lunar Labs]] |
||
| + | </tabber> |
||
==Media== |
==Media== |
||
| + | {{Col-begin}} |
||
| − | <gallery type="slideshow" position="center"> |
||
| + | {{MultiColumnList}} |
||
| + | <gallery type="slideshow" widths="200" position="center"> |
||
| + | City_Center.png |
||
| + | Map_BlackLung.png |
||
| + | Map_Blood.png |
||
| + | Map_Bloodbath.png |
||
| + | Map_Brushwood.png |
||
| + | Map_CabinFever.png |
||
| + | Map_CityWings.png |
||
| + | Map_ColdSeed.png |
||
| + | Map_CostaRecon.png |
||
| + | Map_Crystal.png |
||
| + | Map_Forest.png |
||
| + | Map_DeadWater.png |
||
| + | Map_Dunes.png |
||
| + | Map_DeathRoom.png |
||
| + | DeathRoomInvis01.jpg |
||
| + | Map_DeathRow.png |
||
| + | Map_DesertFox.png |
||
| + | Map_Glitch.png |
||
| + | Map_Thunder.png |
||
| + | Map_Dredge.png |
||
| + | Map_Freezer.png |
||
| + | Map_GhostTown.png |
||
| + | Map_Grave.png |
||
| + | Map_Hammer.png |
||
| + | Map_Ravine.png |
||
| + | Map_HeavyMetal.png |
||
| + | Map_HellGate.png |
||
| + | Map_JunkFlea.png |
||
| + | Map_JunkFlea 2.png |
||
| + | Map_KillCreek.png |
||
| + | Map_LunarLabs.png |
||
| + | Map_NemexisHQ.png |
||
| + | Map_NemexisLab.png |
||
| + | Map_Neptune.png |
||
| + | Map_Office.png |
||
| + | Map_OilRig.png |
||
| + | Map_Outpost.png |
||
| + | Map_Overdose.png |
||
| + | Map_Piazza.png |
||
| + | Map_PowerSurge.png |
||
| + | Map_PumpJack.png |
||
| + | Map_Quantum.png |
||
| + | Map_Rattlesnake.png |
||
| + | Map_Canyon.png |
||
| + | Map_Roadkill.png |
||
| + | Map_Estate.png |
||
| + | Map_SandHog.png |
||
| + | Map_Sector25.png |
||
| + | Map_ShortFuse.png |
||
| + | Map_Showdown.png |
||
| + | Map_Slaugher.png |
||
| + | Map_SnowValley.png |
||
| + | Map_Bridge.png |
||
| + | Map_Training.png |
||
| + | Map_Training1.png |
||
| + | Map_Treasure.png |
||
| + | Map_TwoTowers.png |
||
| + | Map_Vertigo.png |
||
| + | Map_MouseTrap.png |
||
| + | Map_Warhead.png |
||
| + | Map_Water.png |
||
| + | Map_Waverider |
||
| + | </gallery> |
||
| + | {{MultiColumnList}} |
||
| + | <gallery type="slideshow" widths="200" position="center"> |
||
MAP_GRAVEDIGGER.jpg|Grave Digger's Layout |
MAP_GRAVEDIGGER.jpg|Grave Digger's Layout |
||
Quarantine_Map.jpg |
Quarantine_Map.jpg |
||
| Line 199: | Line 410: | ||
Showdown place 7.png |
Showdown place 7.png |
||
Showdown place 8.png |
Showdown place 8.png |
||
| + | </gallery> |
||
| + | {{MultiColumnList}} |
||
| + | <gallery type="slideshow" widths="200" position="center"> |
||
Cyrus352-vertigo.jpg |
Cyrus352-vertigo.jpg |
||
Vertigo.jpg |
Vertigo.jpg |
||
| Line 270: | Line 484: | ||
Slaughterhouse1.jpg |
Slaughterhouse1.jpg |
||
</gallery> |
</gallery> |
||
| + | {{Col-end}} |
||
[[Category:Maps]] |
[[Category:Maps]] |
||
Revision as of 21:41, 4 August 2019
A Map is one of the various settings, or playing fields, in Combat Arms. Each layout has its advantages as well as disadvantages. Knowing the map and what tactics to use will improve your chances of winning, such as wearing a Uniform in order to blend into the environment and using any available props to your advantage.
All Maps in Alphabetical Order
|

|
|

|

|

|

|

|

|

|

|

|

|

|

|

|

|

|

|

|

|

|

|

|

|

|

|

|

|

|

|

|

|

|

|

|

|

|

|

|

|

|

|

|

|

|

|

|

|

|

|

|

|

|


Maps by Category


Media
|
|
|


